So, you’ve gone down the rabbit hole of home automation. You’ve been getting deeper and deeper into Home Assistant and its ecosystem. You are configuring new IoT devices and integrations with reckless abandon to automate away problems that you never knew you had. Maybe you installed Home Assistant on an old gaming PC? Or perhaps something like an Intel NUC, or a Raspberry Pi? You’re blissfully unaware of how much you’re now relying on your preciously configured Home Assistant instance. Then it finally happens. Hardware eventually fails, maybe a kernel panic happens. Or, you just take the old gaming PC offline for some updates that didn’t go as planned.
Suddenly it hits you. Your home is no longer fully functional. You can’t set any scenes for your lighting. Your scripts and automation are no longer active. Your space heater’s virtual thermostat is unavailable. You realize you’re unable to arm your security system overnight. Your kids have left the back door open, you didn’t get an alert about it, and now there are 10 neighborhood cats in your kitchen meowing for food. You’ve reached a point where downtime isn’t just inconvenient, it’s downright unacceptable. Home Assistant is now a critically important part of your home.
Read on for an open source solution that provides a way to:
- Replicate Home Assistant’s data in real time to another instance that’s always ready to take over.
- Automatically (and manually) control when and where Home Assistant can run in your cluster.
- Minimize downtime and keep Home Assistant running, even during system updates.
It’s fairly straightforward to integrate Home Assistant into the traditional open source high availability software stack. This stack consists of the following main components:
- DRBD® – Replicates any block device over the network in real time between two or more nodes. DRBD essentially functions as a “network RAID 1” block device without the need to rely on expensive shared storage solutions such as a SAN.
- Pacemaker – The cluster resource manager (CRM). Controls when and where cluster resources such as DRBD resources, mounted file systems, virtual IP addresses, Home Assistant, among others can actively run.
- Corosync – The communication layer used by Pacemaker. Cluster membership and network settings are defined in
/etc/corosync/corosync.conf. - Docker – Home Assistant can easily be deployed as a container using Docker (controlled by Pacemaker in this blog post).
Configuration
There are multiple ways to deploy Home Assistant. The Home Assistant Container method is used here. The cluster nodes used in this blog post have the following configuration:
| Node | IP Address | DRBD Backing Disk | Replicated File System | Operating System |
|---|---|---|---|---|
ha-0 | 192.168.222.30 | /dev/sdb | /mnt/home-assistant | Ubuntu 24.04 LTS |
ha-1 | 192.168.222.31 | /dev/sdb | /mnt/home-assistant | Ubuntu 24.04 LTS |
❗ IMPORTANT: The file system can only be actively mounted on one node at a time.
📝 NOTE: The backing disk can be any block device available on the nodes. It can be a logical volume created using LVM, a ZFS volume, a RAID array, or an entire physical or virtual block device. This blog post uses an entire physical disk (/dev/sdb). Imagine two inexpensive 240GB SATA SSDs, one in each node being used for replicating Home Assistant’s persistent storage in real time.
The virtual IP address used to access Home Assistant is 192.168.222.10. Any devices and integrations should be configured to use the virtual IP address. When Home Assistant is running (on either node) it will be accessible at http://192.168.222.10:8123/.
If you’re using Ubuntu’s Uncomplicated Firewall (UFW), you’ll need to open the following ports on each node:
| Port | Protocol | Service |
|---|---|---|
| 5403 | TCP | Corosync |
| 5404 | UDP | Corosync |
| 5405 | UDP | Corosync |
| 7788 | TCP | DRBD |
| 8123 | TCP | Home Assistant |
📝 NOTE: DRBD (by convention) uses TCP port 7788 for the first resource. Any additional resources use an incremented port number.
Run the following ufw commands to open the required ports:
sudo ufw allow 5403/tcp
sudo ufw allow 5404:5405/udp
sudo ufw allow 7788/tcp
sudo ufw allow 8123/tcp
📝 NOTE: Of course when following along you’ll need to be sure to account for any differences in your environment and make substitutions for items such as IP addresses or the DRBD backing disk used.
❗ IMPORTANT: Most of the installation steps in this blog post will need to be performed on both nodes. Assume each step needs to be performed on both nodes unless stated otherwise.
Required Software Components
Both nodes will need Docker, DRBD, and Pacemaker installed to create a highly available instance of Home Assistant. Before continuing on, now is a great time to perform a sudo apt dist-upgrade on both nodes to update to the latest software packages and Linux kernel.
💡 TIP: Reboot all nodes after installing kernel updates. Staying on the same kernel versions for all nodes is always recommended and can be checked by running uname -a.
Installing Docker Engine
There are a few different ways to install docker on Ubuntu. We’ll make use of the convenience script for a quick and easy Docker installation:
curl -fsSL https://get.docker.com -o get-docker.sh
sudo sh ./get-docker.sh
Installing DRBD Using LINBIT’s PPA
sudo add-apt-repository -y ppa:linbit/linbit-drbd9-stack
sudo apt update
sudo apt install -y drbd-dkms drbd-utils
📝 NOTE: The LINBIT PPA is a community repository and might contain release candidate versions of our software. It differs slightly from the repositories available to LINBIT customers.
Verify the newly installed DRBD 9 kernel module is loaded by running:
sudo modprobe drbd && modinfo drbd
Installing Pacemaker
Installing the pacemaker and corresponding resource-agents package on Ubuntu will install all necessary CRM related packages including Corosync:
sudo apt install -y pacemaker crmsh resource-agents-base resource-agents-extra
📝 NOTE: With the release of Ubuntu 24.04, crmsh is no longer installed by default when installing the pacemaker package. Both pcs and crmsh can be used interchangeably to manage Pacemaker clusters.
After installation, the pacemaker.service and corosync.service systemd services are enabled and running. Verify this by running systemctl status pacemaker corosync.
Configuring Pacemaker To Start After Docker
- Create an override for the Pacemaker service:
sudo systemctl edit pacemaker.service - Add both After and Wants dependencies specifying
docker.serviceunder the[Unit]section. Your Pacemakeroverride.conffile should match the configuration below:### Editing /etc/systemd/system/pacemaker.service.d/override.conf ### Anything between here and the comment below will become the new contents of the file [Unit] After=docker.service Wants=docker.service ### Lines below this comment will be discarded - Regenerate systemd’s dependency tree:
sudo systemctl daemon-reload
Configuring Cluster Membership in Corosync
- Stop Pacemaker and Corosync temporarily to configure cluster membership:
sudo systemctl stop pacemaker corosync - Rename the
corosync.conffile generated during the installation process tocorosync.conf.bak:sudo mv /etc/corosync/corosync.conf{,.bak} - Create and edit the file
/etc/corosync/corosync.conf, it should look similar to the configuration below and be identical on both nodes:totem { version: 2 secauth: off cluster_name: ha_cluster transport: knet rrp_mode: passive } nodelist { node { ring0_addr: 192.168.222.30 nodeid: 1 name: ha-0 } node { ring0_addr: 192.168.222.31 nodeid: 2 name: ha-1 } } quorum { provider: corosync_votequorum two_node: 1 } logging { to_syslog: yes } - Start Pacemaker and Corosync:
sudo systemctl start corosync sudo systemctl start pacemaker - Verify cluster membership with both nodes listed Online by running
sudo crm status:Cluster Summary: * Stack: corosync * Current DC: ha-0 (version 2.1.6-6fdc9deea29) - partition with quorum * Last updated: Sat May 4 20:12:42 2024 * Last change: Sat May 4 20:07:40 2024 by hacluster via crmd on ha-0 * 2 nodes configured * 0 resource instances configured Node List: * Online: [ ha-0 ha-1 ] Full List of Resources: * No resources📝 NOTE: It can take a few seconds for nodes to enter an Online state while Pacemaker elects a designated coordinator (DC).
Configuring DRBD
- Create and edit the file
/etc/drbd.d/home-assistant.res. It should look similar to this:resource home-assistant { device /dev/drbd0; disk /dev/sdb; meta-disk internal; on ha-0 { address 192.168.222.30:7788; node-id 0; } on ha-1 { address 192.168.222.31:7788; node-id 1; } connection-mesh { hosts ha-0 ha-1; } }❗ IMPORTANT: The node ID parameters used by both DRBD and Corosync are unique to each individual component. DRBD’s
node-idvalues increment starting from 0, whereas Corosync’snodeidvalues increment starting from 1.
- Metadata creation and bringing up the DRBD virtual block device:
# Ensure DRBD's backing disk is free of any file system or metadata signatures sudo wipefs -afq /dev/sdb # Create DRBD's metadata sudo drbdadm create-md home-assistant # Bring up the DRBD virtual block device (/dev/drbd0) sudo drbdadm up home-assistant - The DRBD resource should now be in a Connected state. However, it will show up as Inconsistent when running
drbdadm status:home-assistant role:Secondary disk:Inconsistent ha-1 role:Secondary peer-disk:Inconsistent - On ONE node only prevent a full synchronization of data (because there is no preexisting data that you need to synchronize) from one node to the other. This step will save you time, especially if you would be synchronizing a large amount of storage.
# Set newly created resource data to 'Consistent' sudo drbdadm new-current-uuid home-assistant --clear-bitmap - DRBD should now present itself as UpToDate when running
drbdadm status:home-assistant role:Secondary disk:UpToDate ha-1 role:Secondary peer-disk:UpToDate - On ONE node only create an ext4 file system on top of the DRBD resource:
Behind the scenes DRBD will detect a resource is being actively written to. DRBD then auto-promotes the resource to Primary. Once the file system creation is complete (the write I/O ceases and writes are replicated to the peer DRBD device), DRBD will demote the device back to Secondary.# Replicated file system for storing Home Assistant data sudo mkfs.ext4 /dev/drbd0
Configuring Pacemaker
- On ONE node only save the following configuration as
cib.txt. Make any changes necessary such as changing the node names or virtual IP address:
The configuration above (known as the cluster information base)sets up the following cluster resources to manage:node 1: ha-0 node 2: ha-1 primitive p_drbd_home-assistant ocf:linbit:drbd \ params drbd_resource="home-assistant" \ op start interval="0s" timeout="240s" \ op stop interval="0s" timeout="100s" \ op monitor interval="29s" role="Promoted" \ op monitor interval="31s" role="Unpromoted" ms ms_drbd_home-assistant p_drbd_home-assistant \ meta promoted-max="1" promoted-node-max="1" \ clone-max="2" clone-node-max="1" \ notify="true" primitive p_fs_home-assistant ocf:heartbeat:Filesystem \ params device="/dev/drbd0" \ directory="/mnt/home-assistant" \ fstype="ext4" \ op start interval="0" timeout="60s" \ op stop interval="0" timeout="60s" \ op monitor interval="20" timeout="40s" primitive p_vip_home-assistant ocf:heartbeat:IPaddr2 \ params ip="192.168.222.10" cidr_netmask="24" \ op start interval="0s" timeout="20s" \ op stop interval="0s" timeout="20s" \ op monitor interval="20s" timeout="20s" primitive p_docker_home-assistant ocf:heartbeat:docker \ params image="ghcr.io/home-assistant/home-assistant:stable" \ allow_pull=true \ name=homeassistant \ run_opts="--privileged -e TZ=America/Los_Angeles \ -v /mnt/home-assistant:/config \ -v /run/dbus:/run/dbus:ro --network=host" \ op start interval="0s" timeout="120s" \ op stop interval="0s" timeout="120s" \ op monitor interval="20s" timeout="100s" group g_home-assistant \ p_fs_home-assistant p_vip_home-assistant p_docker_home-assistant colocation c_home-assistant_on_drbd \ inf: g_home-assistant ms_drbd_home-assistant:Promoted order o_drbd_before_home-assistant \ ms_drbd_home-assistant:promote g_home-assistant:start property cib-bootstrap-options: \ have-watchdog=false \ cluster-infrastructure=corosync \ cluster-name=ha_cluster \ stonith-enabled=false \ maintenance-mode=true- A DRBD resource called
home-assistantand the corresponding multi-state resource - An ext4 file system associating the DRBD resource with a mount point
- A virtual IP address on
192.168.222.10 - A Docker instance of Home Assistant
- A resource group associating related resources together which also defines the stop and stop order of the resources
- A constraint for only running Home Assistant where DRBD is promoted to Primary
- A constraint for promoting DRBD to Primary before Home Assistant is started
- A DRBD resource called
- On ONE node only load the new Pacemaker configuration:
The following warning can be ignored. Fencing will be implemented in a follow-up blog post:sudo crm configure load replace cib.txt
At this point, Pacemaker will not immediately start resources in the cluster because of the propertyWARNING: (unpack_config) warning: Blind faith: not fencing unseen nodesmaintenance-mode=true. - Restart Pacemaker on both nodes one last time:
📝 NOTE: This fixes the version string from not showing when checking the cluster status (sudo systemctl restart pacemakersudo crm status). - On ONE node only take the cluster out of maintenance mode. Home Assistant will immediately start on one of the available nodes:
sudo crm configure property maintenance-mode=false
Checking Cluster Status After Configuring
Running sudo crm status (from either node) reveals Home Assistant is running on ha-0:
Cluster Summary:
* Stack: corosync
* Current DC: ha-1 (version 2.1.6-6fdc9deea29) - partition with quorum
* Last updated: Sat May  4 20:35:03 2024 on ha-0
* Last change:  Sat May  4 20:32:55 2024 by root via cibadmin on ha-0
* 2 nodes configured
* 5 resource instances configured

Node List:
* Online: [ ha-0 ha-1 ]

Full List of Resources:
* Resource Group: g_home-assistant:
    * p_fs_home-assistant       (ocf:heartbeat:Filesystem):      Started ha-0
    * p_vip_home-assistant      (ocf:heartbeat:IPaddr2):         Started ha-0
    * p_docker_home-assistant  (ocf:heartbeat:docker):  Started ha-0
* Clone Set: ms_drbd_home-assistant [p_drbd_home-assistant] (promotable):
    * Promoted: [ ha-0 ]
    * Unpromoted: [ ha-1 ]
Running drbdadm status on ha-0 shows the resource is currently Primary:
home-assistant role:Primary
    disk:UpToDate
    ha-1 role:Secondary
      peer-disk:UpToDate
Checking file system mounts on ha-0 with mount | grep home-assistant shows that the replicated file system is currently mounted:
/dev/drbd0 on /mnt/home-assistant type ext4 (rw,relatime)
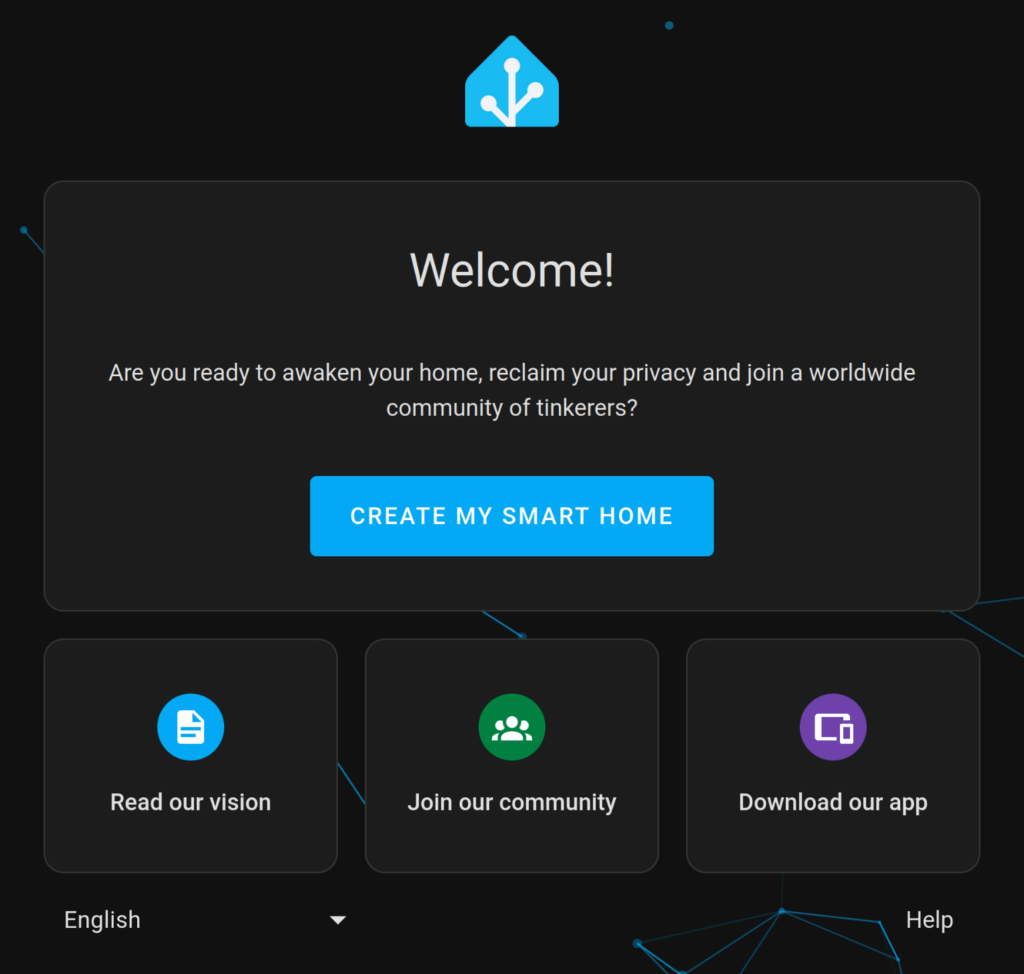
Accessing Home Assistant using the virtual IP (http://192.168.222.10:8123/) displays the welcome page, as expected:

Conclusion
Home Assistant is now highly available and managed by Pacemaker. You’re free to configure Home Assistant as a new deployment or migrate your current instance to the new cluster. Here are some helpful commands for managing your new cluster:
- Restart Home Assistant (the Docker instance). Alternatively,
stopandstartcommands can be substituted forrestart:sudo crm resource restart p_docker_home-assistant - Stop all running resources and services managed by Pacemaker (set to
falseto undo):sudo crm configure property stop-all-resources=true - Leave all resources in their current state without active cluster management (set to
falseto undo):sudo crm configure property maintenance-mode=true - Perform a failover or take a single node offline for maintenance:
sudo crm node standby <node_name> - Bring a node out of standby:
sudo crm node online <node_name> - Show the current cluster configuration:
sudo crm configure show - Edit the current cluster configuration:
sudo crm configure edit
Upgrading Home Assistant in a cluster configuration such as this is as simple as running these two commands:
- Pull the latest Home Assistant container image (run on both nodes):
sudo docker pull ghcr.io/home-assistant/home-assistant:stable - Restart the Home Assistant Docker instance. The Home Assistant container is recreated using the recently pulled container image:
sudo crm resource restart p_docker_home-assistant
See our Pacemaker Clustering Command Cheatsheet for managing Pacemaker clusters with either crmsh or pcs. To learn more about DRBD, check out the DRBD User’s Guide. In a follow-up blog post, we’ll investigate optimizing various settings, looking at more approaches to high availability, and introducing a fencing implementation inspired by Home Assistant.
❗ IMPORTANT: Without fencing, a two-node cluster runs the risk of a split-brain occurring. While split-brains can be manually recovered from, they can lead to extra downtime, and in the worst case, potential data loss.


