With container orchestrators like Kubernetes, OpenShift, and Nomad often taking the spotlight, Docker swarm hasn’t been getting as much attention. That doesn’t mean we’ve forgotten about it! Docker swarm is known for being easy to learn and use, making it an appealing container orchestration platform for smaller teams, or anyone looking to focus more on their applications than the platform they’re running on.
Since the inception of Docker volume plug-ins back in 2015, LINBIT® has supported a plug-in for managing DRBD® replicated volumes through the Docker CLI. An older LINBIT blog post published with the release of LINBIT’s first Docker volume plug-in highlighted its use by standing up a WordPress blog with a MariaDB database using Docker Compose. In the spirit of the original blog post, we’ll set up a similar WordPress blog and MariaDB database using Docker in swarm mode. Persistent data for both the blog and the database will be stored on, and replicated by, LINBIT SDS through LINBIT’s Docker volume plugin.
Using Docker in swarm mode will ensure that there is an instance of each container running somewhere in the swarm cluster at all times. LINBIT SDS will ensure that each of those containers has access to a replica of the respective container’s Docker volume. Combining Docker swarm’s container orchestration with LINBIT SDS’ synchronously replicated Docker volumes results in a highly available (HA) set of microservices.
Prerequisites
Of course, we’re going to have to assume you’ve already done some things, otherwise this would be a very long blog post. You’ll need a LINSTOR® cluster running, where each of your Docker swarm nodes are added to the LINSTOR cluster as a LINSTOR satellite.
If you’re not sure about how to set that up, you can follow the subsections below for guidance. If you’ve already set that up, skip the subsections below and move on to installing the LINBIT SDS Docker volume plug-in.
Install and Initialize a LINSTOR Cluster
This is well covered in Section 1 of the LINSTOR User’s Guide. Specifically, you’ll need to follow these short sections covering the following topics:
- Installing LINSTOR packages OR running LINSTOR as Containers
- Initializing your cluster (if you’re using LINSTOR packages)
- Using the LINSTOR client
- Adding nodes to your cluster
- Creating storage pools
Once you’ve initialized your LINSTOR cluster, you should see your cluster nodes and storage pool(s) in the output from the following commands:
[root@swarm-0 ~]# linstor --no-utf8 node list
+------------------------------------------------------------+
| Node    | NodeType  | Addresses                   | State  |
|============================================================|
| swarm-0 | COMBINED  | 192.168.222.50:3366 (PLAIN) | Online |
| swarm-1 | SATELLITE | 192.168.222.51:3366 (PLAIN) | Online |
| swarm-2 | SATELLITE | 192.168.222.52:3366 (PLAIN) | Online |
+------------------------------------------------------------+

[root@swarm-0 ~]# linstor --no-utf8 storage-pool list
+----------------------------------------------------------------8<-+
| StoragePool          | Node    | Driver    | PoolName          8< |
|================================================================8<=|
| DfltDisklessStorPool | swarm-0 | DISKLESS  |                   8< |
| DfltDisklessStorPool | swarm-1 | DISKLESS  |                   8< |
| DfltDisklessStorPool | swarm-2 | DISKLESS  |                   8< |
| lvm-thick            | swarm-0 | LVM       | drbdpool          8< |
| lvm-thick            | swarm-1 | LVM       | drbdpool          8< |
| lvm-thick            | swarm-2 | LVM       | drbdpool          8< |
| lvm-thin             | swarm-0 | LVM_THIN  | drbdpool/thinpool 8< |
| lvm-thin             | swarm-1 | LVM_THIN  | drbdpool/thinpool 8< |
| lvm-thin             | swarm-2 | LVM_THIN  | drbdpool/thinpool 8< |
+----------------------------------------------------------------8<-+
Installing Docker CE and Initializing the Swarm Cluster
With the assumption that you’re using Linux, the best general purpose operating system ever created, you can follow the instructions from Docker documentation covering the following:
Once you’ve initialized the Swarm cluster, you should see your nodes listed in the following command’s output:
[root@swarm-0 ~]# docker node ls
ID            HOSTNAME   STATUS    AVAILABILITY   MANAGER STATUS
zc74...3b *   swarm-0    Ready     Active         Leader
a2ug...1p     swarm-1    Ready     Active
6tjt...ry     swarm-2    Ready     Active
Install and Configure the LINBIT SDS Docker Volume Plug-in
The installation and configuration needs to be done on all nodes. Verify you substitute your storage pool name (lvm-thin in my case) as well as the hostname (swarm-0 in my case) or IP address of your controller in your plug-in configuration. The other settings are fine as is and are used as defaults for volume creation.
Run the following commands to write the configuration file and install the LINBIT SDS Docker volume plug-in:
# cat << EOF > /etc/linstor/docker-volume.conf
[global]
storagepool = lvm-thin
fs = xfs
size = 100MB
replicas = 2
controllers = linstor://swarm-0
EOF

# docker plugin install \
    linbit/linstor-docker-volume --grant-all-permissions
With the plug-in installed and configured, you’re now able to create LINSTOR volumes using the Docker CLI from any one node in the swarm:
[root@swarm-0 ~]# docker volume create \
                    --opt fs=xfs --opt size=100 \
                    -d linbit/linstor-docker-volume test-0
test-0

[root@swarm-0 ~]# linstor --no-utf8 resource list
+-------------------------------------------------------------+
| ResourceName | Node    | Port | Usage  | Conns |      State |
|=============================================================|
| test-0       | swarm-0 | 7000 | Unused | Ok    |   UpToDate |
| test-0       | swarm-1 | 7000 | Unused | Ok    |   UpToDate |
| test-0       | swarm-2 | 7000 | Unused | Ok    | TieBreaker |
+-------------------------------------------------------------+

[root@swarm-0 ~]# docker volume rm test-0
test-0
[root@swarm-0 ~]# linstor --no-utf8  resource list
+----------------------------------------------------+
| ResourceName | Node | Port | Usage | Conns | State |
|====================================================|
+----------------------------------------------------+
Creating the Swarm Services
For our swarm services to be able to communicate with one another, we have to create an overlay network that we can attach our services to. All commands in this section should only be run from the swarm manager:
[root@swarm-0 ~]# docker network create -d overlay wp
26nua66zr4yoaq81hd66rg5cq
Create the MariaDB root password and WordPress database secrets. I will use openssl to generate random 20 character base64 encoded strings and pipe the output to the docker secret create command to set my passwords:
[root@swarm-0 ~]# openssl rand -base64 20 | docker secret create root_db_password -
01h7clhh9q998z5k0sfgewdju

[root@swarm-0 ~]# openssl rand -base64 20 | docker secret create wp_db_password -
pbdxu7374hq61451vbni120n8
Create the MariaDB service’s LINSTOR volume, and then create the swarm service:
[root@swarm-0 ~]# docker volume create \
            -d linbit/linstor-docker-volume --opt size=2G dbvol
dbvol

[root@swarm-0 ~]# docker service create \
  --name mariadb \
  --replicas 1 \
  --constraint=node.role==manager \
  --network wp \
  --publish 3306:3306 \
  --secret source=root_db_password,target=root_db_password \
  --secret source=wp_db_password,target=wp_db_password \
  -e MYSQL_ROOT_PASSWORD_FILE=/run/secrets/root_db_password \
  -e MYSQL_PASSWORD_FILE=/run/secrets/wp_db_password \
  -e MYSQL_USER=wp \
  -e MYSQL_DATABASE=wp \
  --mount type=volume,src=dbvol,dst=/var/lib/mysql,volume-driver=linbit/linstor-docker-volume \
  mariadb

kq7fqbu1d5lzflhoeqzfm16k4
overall progress: 1 out of 1 tasks
1/1: running   [==================================================>]
verify: Service converged
Create the WordPress service’s LINSTOR volume, and then create the swarm service:
[root@swarm-0 ~]# docker volume create \
                    -d linbit/linstor-docker-volume --opt size=1G wpvol
wpvol

[root@swarm-0 ~]# docker service create \
  --name wp \
  --constraint=node.role==worker \
  --replicas 1 \
  --network wp \
  --publish 80:80 \
  --secret source=wp_db_password,target=wp_db_password,mode=0444 \
  -e WORDPRESS_DB_USER=wp \
  -e WORDPRESS_DB_PASSWORD_FILE=/run/secrets/wp_db_password \
  -e WORDPRESS_DB_HOST=mariadb \
  -e WORDPRESS_DB_NAME=wp \
  --mount type=volume,src=wpvol,dst=/var/www/html/wp-content,volume-driver=linbit/linstor-docker-volume \
  wordpress

i6dd73oq4zn8hw0wd4bf3hv3h
overall progress: 1 out of 1 tasks
1/1: running   [==================================================>]
verify: Service converged
If everything was successful, you should now see that you have LINSTOR resources InUse and swarm services running in your Docker swarm cluster:
[root@swarm-0 ~]# linstor --no-utf8 resource list
+-----------------------------------------------------------------------------------+
| ResourceName | Node    | Port | Usage  | Conns |      State | CreatedOn           |
|===================================================================================|
| dbvol        | swarm-0 | 7000 | InUse  | Ok    |   UpToDate | 2021-08-03 21:18:32 |
| dbvol        | swarm-1 | 7000 | Unused | Ok    |   UpToDate | 2021-08-03 21:18:32 |
| dbvol        | swarm-2 | 7000 | Unused | Ok    | TieBreaker | 2021-08-03 21:18:31 |
| wpvol        | swarm-0 | 7001 | Unused | Ok    |   UpToDate | 2021-08-03 21:19:03 |
| wpvol        | swarm-1 | 7001 | InUse  | Ok    |   Diskless | 2021-08-03 21:19:02 |
| wpvol        | swarm-2 | 7001 | Unused | Ok    |   UpToDate | 2021-08-03 21:19:03 |
+-----------------------------------------------------------------------------------+

[root@swarm-0 ~]# docker service ls
ID             NAME      MODE         REPLICAS   IMAGE              PORTS
kq7fqbu1d5lz   mariadb   replicated   1/1        mariadb:latest     *:3306->3306/tcp
i6dd73oq4zn8   wp        replicated   1/1        wordpress:latest   *:80->80/tcp
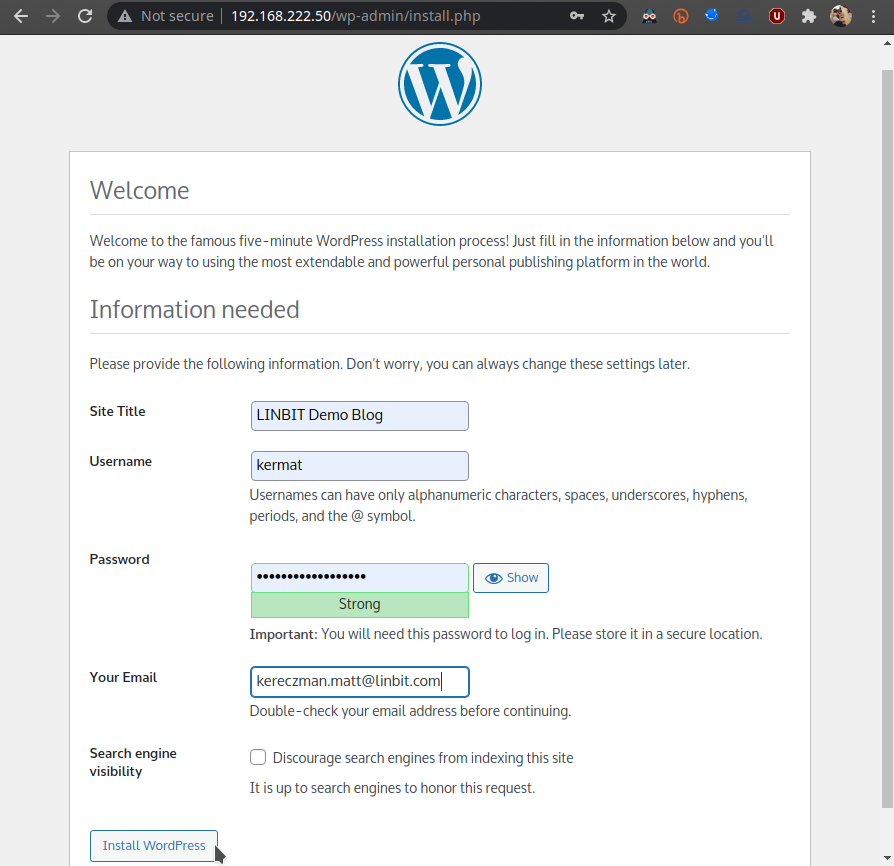
Finish Setting Up WordPress
Point your browser at any swarm node on port 80 and you should see you’ll be able to continue setting up your WordPress installation. Swarm will route requests to any running swarm service through any swarm node.
Once you click install, you can start creating your WordPress blogs! Go ahead and create one, then try halting the Docker swarm worker running the WordPress container. From there, you should see that swarm will start another instance of the WordPress service, and LINSTOR will reattach the persistent storage to the instance’s new worker node.
There are a few exercises left for the reader to explore before a setup like this would be ready for a production setting. The following short list of to-dos will get you started in the right direction:
- 3x LINSTOR controllers for an HA LINSTOR control plane
- 3x Docker swarm managers for an HA Docker swarm control plane
- SSL/TLS certificates for WordPress
Also, if you’re looking to scale WordPress using swarm, rather than simply utilizing swarm’s HA container management as we did here, consider standing up an HA DRBD Reactor cluster and storing your WordPress persistent volumes there. Alternatively, you could create a swarm service that serves an NFS export backed by LINSTOR SDS for other Docker swarm services. Of course, if you’d like to discuss your use case with us, whether you’re interested in LINBIT’s support or just looking for some feedback, don’t hesitate to reach out!