LINBIT VSAN User Guide
1. Introduction
LINBIT® VSAN is a software-defined storage solution for hyperconverged infrastructure, based on the LINBIT-developed DRBD® and LINSTOR® open source software. It uses AlmaLinux as a foundation and uses software by LINBIT to offer highly available storage to hypervisors through a convenient iSCSI target.
It is built primarily with VMware ESXi as a target platform in mind, but it is fully independent of the hypervisor software, so it should also work on any other virtualization platform.
| Not all best practices recommended in LINBIT how-to guides are implemented in LINBIT VSAN. For example, it is not yet possible to configure multiple network links for separating application and replication traffic. |
2. Architecture
Logically, LINBIT VSAN fits in between the hypervisor and the virtual machines it offers storage for.

In practice, VSAN runs one of its instances as a virtual machine on each hypervisor in the cluster. The hypervisor passes its local storage through to VSAN, which then replicates the data on the storage across the cluster. One of the VSAN virtual machines exports an iSCSI target through a static IP. You can feed this iSCSI target back to the hypervisor to offer a highly available datastore. Then, you can use this datastore to store virtual machines and disk images on solid, redundant storage.
3. Prerequisites
Before you can start using LINBIT VSAN, you need a few things first:
-
LINBIT customer credentials, which are also used to log in to the LINBIT Customer Portal You can get these by requesting an evaluation.
-
LINBIT VSAN installation medium that you will receive through a download link after requesting an evaluation
-
A virtualization platform, such as VMware ESXi
-
Unrestricted Internet access for all VSAN virtual machines[1]
3.1. Number of nodes
Because VSAN makes use of the DRBD quorum mechanism, a VSAN cluster needs to consist of at least three member nodes.
The usual limitations and caveats of systems using quorum apply, for example, an odd number of nodes is greatly preferred over an even one. Refer to the “Quorum” section in the DRBD 9 User Guide for more information.
3.2. Installing LINBIT VSAN by using an ISO file
LINBIT distributes LINBIT VSAN as an ISO image. The following instructions will take you through the steps of installing LINBIT VSAN from an ISO image file on your hypervisors.
| Alternatively, you can install LINBIT VSAN directly to physical machines, eliminating the need for any hypervisor software. Because LINBIT VSAN is based on the AlmaLinux operating system, AlmaLinux guidelines for creating a physical installation medium apply. For a guide on how to write the LINBIT VSAN image to a physical medium, refer to the AlmaLinux Wiki page on the subject. When following the AlmaLinux Wiki instructions, simply use the LINBIT VSAN appliance image in place of the AlmaLinux image. |
Take the following steps to install your LINBIT VSAN cluster:
-
Create one virtual machine for LINBIT VSAN on each hypervisor node.
-
Attach one virtual or local disk for the operating system itself.
-
Pass through the local storage devices that should be used by VSAN for data replication.
Make sure the storage devices you pass through remain completely empty. For example, do not create any partitions or LVM volumes. -
Assign at least one network adapter to each of the virtual machines. VSAN acquires an IP address via DHCP.
-
Start the virtual machines and complete the operating system setup on each machine. This is similar to a regular AlmaLinux installation process.
Do not use a Kickstart file to automate the installation process. The VSAN ISO already has a Kickstart file to customize certain aspects of the AlmaLinux installer. Using an additional Kickstart file will cause conflicts. Take note of the special requirements regarding Networking and Time during the setup process.
After finishing these installation steps, you can start the VSAN initialization process by going to the IP address of one of your virtual machines in a web browser.
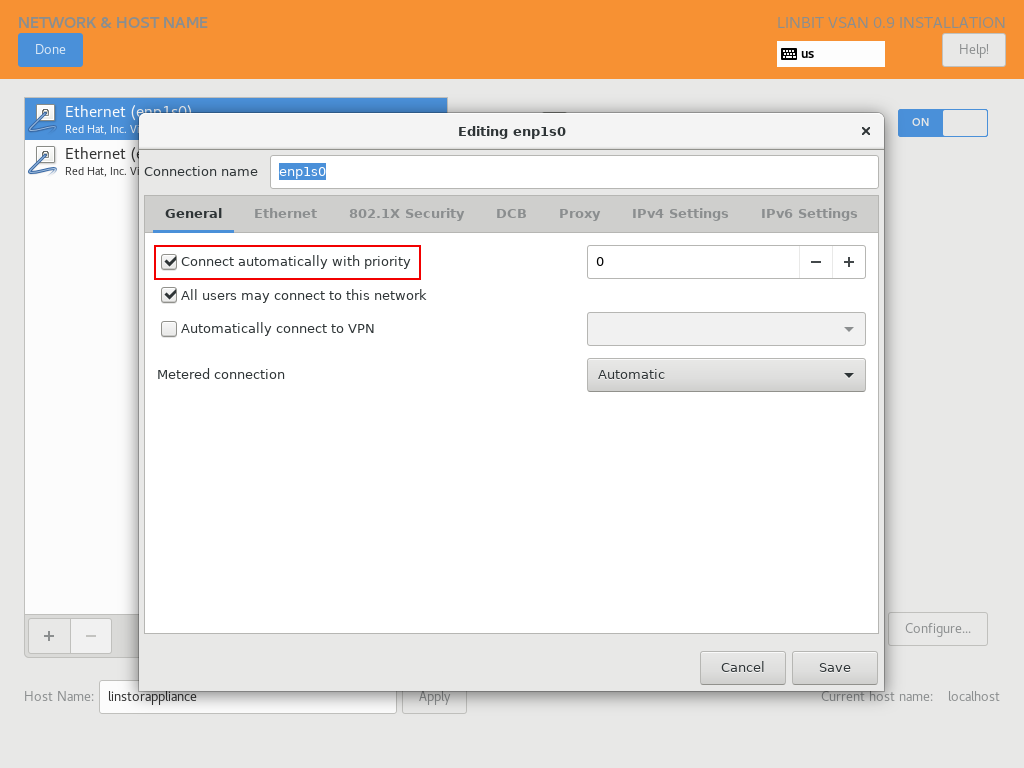
3.2.1. Networking
VSAN relies on a network connection being made available on boot. By default, the AlmaLinux installer configures the network interface to not automatically connect.
When configuring the network interface, verify that the “Connect automatically with priority” checkbox is checked.
3.2.2. Time
In a cluster of multiple servers, it is important to ensure that the clocks of the individual nodes are in sync with each other. You can do this by using a NTP (Network Time Protocol) synchronizing service. Verify that an NTP service is enabled in the AlmaLinux setup and that you synchronize the time between all nodes, after the installation finishes.
4. Initialization
After you have installed the operating system and all VSAN virtual machines have booted, you can set up your VSAN cluster.
|
To ensure the setup goes smoothly, make sure you meet the following requirements before starting the initialization process:
|
To get started, go to the IP address of a VSAN virtual machine in a web browser.
If you are not sure what the IP address of your virtual machine is, refer to the message VSAN displays in the console when logging in over SSH:
Welcome to LINBIT VSAN version 0.9.12

Please visit the following URL in your
browser to start the setup process:

https://192.168.122.190:443
[...]
If you need to recall the message after logging in, you can enter a cat /etc/motd command.
VSAN gives you a one-stop Web UI wizard to configure the storage cluster. Follow the instructions in the wizard to complete the installation.
You can find step-by-step screenshots on the the LINBIT website, and there is a walk-through video.
| For general help with the terms and concepts used during the setup, refer to the LINSTOR User Guide. |
5. Administration
The VSAN Web UI intentionally offers relatively minimal administration and monitoring capabilities.
One of design philosophies behind VSAN is that, after the setup finishes, it should be as close to a regular Linux system as possible.
So, if you are familiar with the technologies under the hood, you are free to directly use the underlying operating system and treat it as a standard AlmaLinux-based LINSTOR cluster.