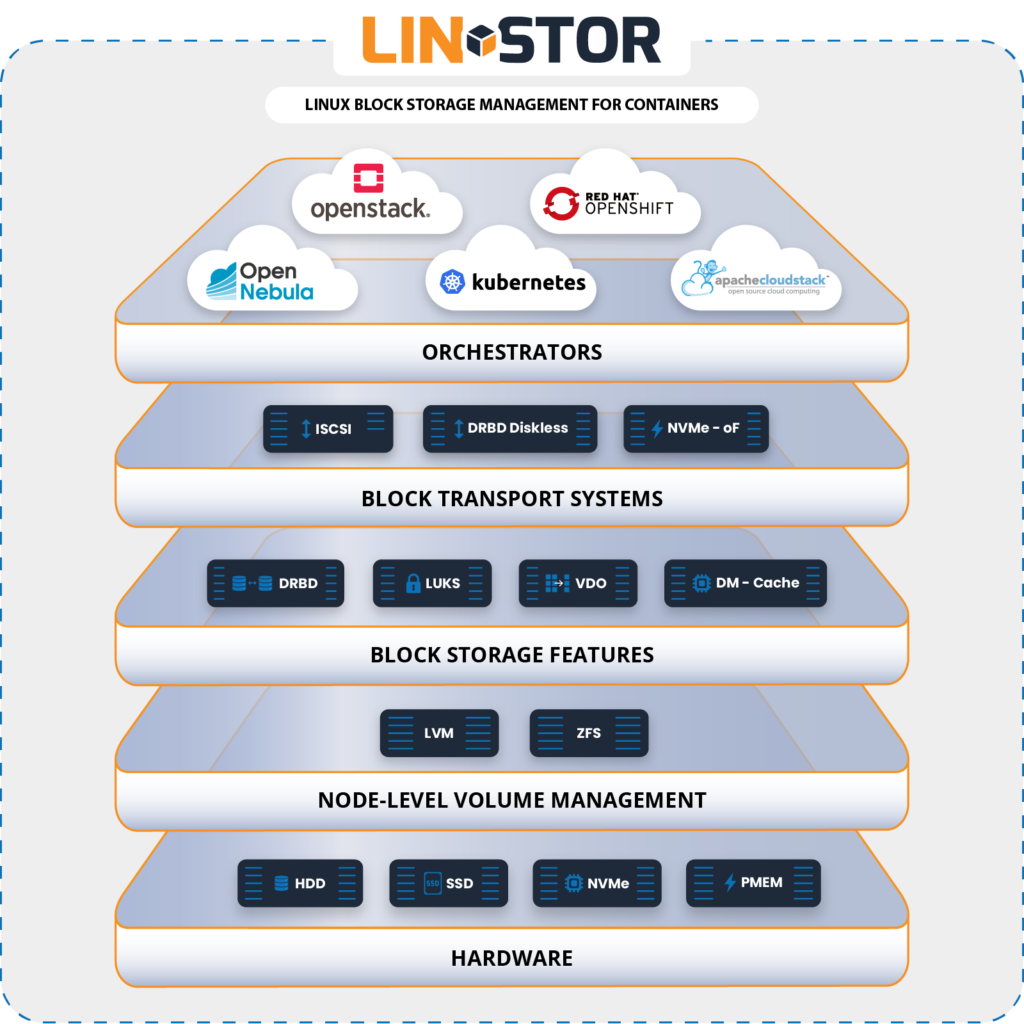
LINSTOR has multiple uses, but it is typically used to manage a large number of DRBD replicated storage resources to ensure high availability and proven high performance for data that your applications and services depend on. LINSTOR integrates with many platforms, including Kubernetes, CloudStack, Docker, OLVM, OpenNebula, Proxmox VE, and more.
LINSTOR’S MISSION
The mission of LINSTOR is to make it easier and more efficient to manage software-defined storage resources within Linux clusters and bring high availability and high performance to the data that your applications depend on.
LINSTOR is a flexible solution and you can use it on bare-metal clusters, in a cloud or hybrid cloud, virtualized, or in containers. You can also integrate LINSTOR with many platforms, such as Kubernetes, CloudStack, Docker, OpenNebula, Proxmox VE, and others. By using LINSTOR’s native integrations, you can build, run, and control persistent block storage solutions in these platforms more simply. You can also bring data storage features to platforms that you might not otherwise be able to, such as high availability (by using DRBD), and disaster recovery (by using snapshot shipping).
To make deploying and running LINSTOR hassle-free, LINBIT® offers an enterprise subscription, LINBIT SDS, which includes LINSTOR, DRBD, related software utilities, and expert support from LINBIT engineers and developers. From planning to production, LINBIT can help you and your operations team succeed with LINBIT SDS.
Fastest Persistent Storage
"LINSTOR's record results prove we can speed up High Availability at a large scale without resorting to high-cost proprietary software stacks."
Philipp Reisner
LINBIT CEO
The Science of the System
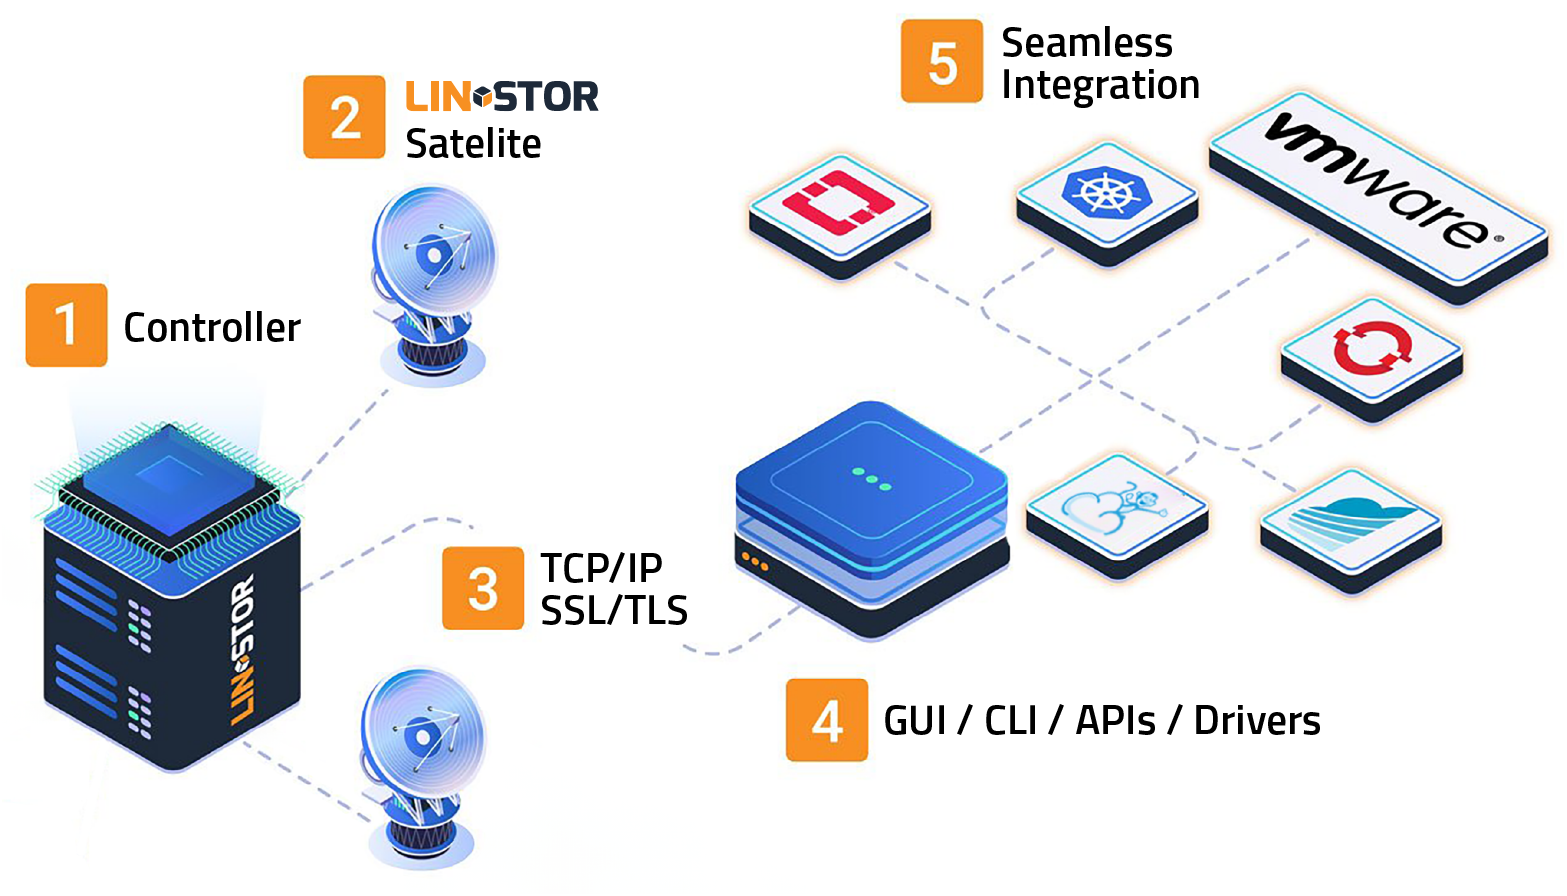
Controller, Satellite, and User Interface
The LINSTOR® system consists of multiple server and client components.
A LINSTOR controller manages the configuration of the LINSTOR cluster and all its managed storage resources
LINSTOR® has a container storage interface (CSI) driver for Kubernetes and is compatible with OpenShift. LINSTOR can also be used independently of a cloud, virtualization, or container platform to manage large DRBD clusters.
Built With Developers In Mind
LINSTOR® has a container storage interface (CSI) driver for Kubernetes and is compatible with OpenShift. LINSTOR can also be used independently of a cloud, virtualization, or container platform to manage large DRBD clusters.