Introduction
RustFS is an open source S3-compatible storage system written in Rust. Version 1.0.0 was released through GitHub in July 2025. The software is still tagged as in an alpha state but with changes in the open source S3 object storage landscape, the project has been building interest and attraction.
Because LINSTOR® can ship and restore storage snapshots to S3-compatible storage, it seems worthwhile to show how that might work with RustFS. This article will show how you can ship snapshots of a Kubernetes PersistentVolumeClaim (PVC) that is backed by LINSTOR-managed storage to RustFS object storage, for disaster recovery or migration purposes.
Prerequisites and storage
This guide will build on the foundation of other published LINBIT® guides to simplify showing how RustFS can work with LINSTOR. To follow the instructions in this guide, you will need to have an existing LINSTOR in Kubernetes cluster, along with a LINSTOR-backed PVC. If you are starting from scratch and you do not have a LINSTOR in Kubernetes cluster set up already, “Using minikube to Get Started With LINSTOR in Kubernetes” might be the fastest way to get up and running, for testing purposes.
With LINSTOR up and running in Kubernetes, instructions in the LINSTOR User Guide describe how to provision volumes and create PVCs. These are general instructions that you can adapt to the requirements of workloads that you are interested in. The LINSTOR User Guide also has instructions for working with LINSTOR-managed snapshots Kubernetes.
Shipping snapshots (backups) of a Kubernetes PVC to S3-compatible object storage is an obvious use case for demonstrating how LINSTOR and RustFS might work together. This guide will show how you can use LINSTOR to ship snapshots of an example PostgreSQL database on a LINSTOR-backed PVC to RustFS storage, as part of a disaster recovery plan.
Assumptions
If you followed the instructions in the “Using minikube to Get Started With LINSTOR in Kubernetes” blog article, you will have a 3-node minikube VM Kubernetes cluster with a LINSTOR storage pool, named vg1-thin, backed by an LVM thin-provisioned logical volume. Thin-provisioned LVM or ZFS-backed storage is a requirement for taking storage snapshots in LINSTOR.
The instructions in this guide also assume that you deployed RustFS somewhere reachable from your Kubernetes cluster, and that you have created a RustFS access key, secret key, and bucket. If you have not done this, you can follow instructions in RustFS documentation. For testing purposes, I used Docker to deploy a basic RustFS instance on another system on my local network.
Creating LINSTOR storage assets for RustFS and CloudNativePG in Kubernetes
With a LINSTOR storage pool named vg1-thin created in Kubernetes, you can create a few more necessary LINSTOR abstractions in Kubernetes that you will need for this setup:
- A storage class
- A LINSTOR encryption passphrase secret
- A RustFS secret
- A volume snapshot class that references a local RustFS instance as a LINSTOR backup shipping target
Creating a LINSTOR storage class in Kubernetes
Enter the following command to create a configuration file that defines a Kubernetes storage class, based on the thin-provisioned LINSTOR storage pool, vg-1. Later, you will reference this storage class when you deploy a CloudNativePG instance in your Kubernetes cluster, to manage the PostgreSQL lifecycle in your cluster.
cat << EOF > linstor-basic-storage-class.yaml
---
apiVersion: storage.k8s.io/v1
kind: StorageClass
metadata:
  # The name used to identify this StorageClass.
  name: linstor-basic-storage-class
  # The name used to match this StorageClass with a provisioner.
  # linstor.csi.linbit.com is the name that the LINSTOR CSI plugin uses to identify itself
provisioner: linstor.csi.linbit.com
volumeBindingMode: WaitForFirstConsumer
parameters:
  # LINSTOR will provision volumes from the vg1-thin storage pool configured
  # on the satellite nodes in the LINSTOR cluster specified in the plugin's deployment
  autoPlace: "3"
  storagePool: "vg1-thin"
  resourceGroup: "linstor-basic-storage-class"
  # Setting a fstype is required for "fsGroup" permissions to work correctly.
  # Currently supported: xfs/ext4
  csi.storage.k8s.io/fstype: xfs
EOF
Apply the configuration:
kubectl apply -f linstor-basic-storage-class.yamlOutput will show that the storage class was created. Verify this by entering the following command:
kubectl get storageclasses.storage.k8s.ioOutput will show that the storage class exists but has not been referenced (consumed) yet:
NAME                          PROVISIONER                RECLAIMPOLICY   VOLUMEBINDINGMODE      ALLOWVOLUMEEXPANSION   AGE
linstor-basic-storage-class   linstor.csi.linbit.com     Delete          WaitForFirstConsumer   false                  72s
[...]
Creating a LINSTOR encryption passphrase secret in Kubernetes
Create the configuration for a LINSTOR encryption passphrase secret by entering the following command:
 LINSTORMASTPASS=$(echo -n "myverystrongpassword" | base64)
cat << EOF > linstor-encryption-secret.yaml
---
apiVersion: v1
kind: Secret
metadata:
  name: linstor-passphrase
  namespace: linbit-sds
data:
  MASTER_PASSPHRASE: $LINSTORMASTPASS
---
apiVersion: piraeus.io/v1
kind: LinstorCluster
metadata:
  name: linstorcluster
spec:
  linstorPassphraseSecret: linstor-passphrase
EOF
Apply the configuration to create the secret:
kubectl apply -f linstor-encryption-secret.yamlAfter creating it, you can verify the secret exists by entering the following command:
kubectl -n linbit-sds get secretsOutput will be similar to this:
NAME                                                     TYPE                             DATA   AGE
[...]
linstor-passphrase                                       Opaque                           1      3m10s
[...]
Creating a secret to store RustFS keys
Next, create a Kubernetes secret to store your RustFS S3 access and secret keys:
 RUSTFSACCESSKEY=<your_RustFS_access_key_id>
 RUSTFSSECRETKEY=<your_RustFS_secret_key_id>
cat <<EOF > rustfs-secret.yaml
---
kind: Secret
apiVersion: v1
metadata:
  name: linstor-csi-s3-access
  namespace: default
immutable: true
type: linstor.csi.linbit.com/s3-credentials.v1
stringData:
  access-key: "$RUSTFSACCESSKEY"
  secret-key: "$RUSTFSSECRETKEY"
EOF
Apply the configuration to your Kubernetes deployment:
kubectl apply -f rustfs-secret.yamlVerify that the secret exists in the linbit-sds name space:
kubectl -n linbit-sds get secretsOutput will be similar to the following:
NAME                                                     TYPE                                       DATA   AGE
[...]
linstor-csi-s3-access                                    linstor.csi.linbit.com/s3-credentials.v1   2      4s
[...]
Installing Kubernetes volume snapshot requirements
Before you can create a volume snapshot class for your RustFS storage, you need to verify that you have some necessary tools. You will need to have a snapshot controller and CRDs related to volume snapshots deployed in your Kubernetes cluster.
Verifying and installing a snapshot controller
You can verify that you have a deployed snapshot controller by entering the following command:
kubectl get pods -A |grep snapshot-controllerThe snapshot controller is typically deployed as a replica set. If output from the command does not show deployed snapshot-controller pods, you can install a snapshot controller by entering the following command.
kubectl apply -k https://github.com/kubernetes-csi/external-snapshotter//deploy/kubernetes/snapshot-controllerVerifying and installing volume snapshot CRDs
You can verify that you have the necessary CRDs related to taking volume snapshots deployed in your cluster, by entering the following command:
kubectl api-resources --api-group=snapshot.storage.k8s.io -onameIf there are no resources shown, you can install the necessary CRDs by entering the following command:
kubectl apply -k https://github.com/kubernetes-csi/external-snapshotter//client/config/crdOutput from entering the kubectl api-resources command shown earlier should show the necessary CRDs:
volumesnapshotclasses.snapshot.storage.k8s.io
volumesnapshotcontents.snapshot.storage.k8s.io
volumesnapshots.snapshot.storage.k8s.io
Creating a volume snapshot class for RustFS in Kubernetes
Next, create a volume snapshot class:
 RUSTFSBUCKET=<your RustFS bucket name>
 RUSTFSENDPOINT=<your RustFS endpoint, reachable from your Kubernetes cluster>
# E.g. RUSTFSENDPOINT=https://yourserver.lan:9000
cat << EOF > linstor-volume-snapshot-class-rustfs.yaml
---
apiVersion: snapshot.storage.k8s.io/v1
kind: VolumeSnapshotClass
metadata:
  name: linstor-csi-snapshot-class-s3
  labels:
    rustfs.com/csi-volumesnapshot-class: "true"
driver: linstor.csi.linbit.com
deletionPolicy: Delete
parameters:
  snap.linstor.csi.linbit.com/type: S3
  snap.linstor.csi.linbit.com/remote-name: myRustFSremote
  snap.linstor.csi.linbit.com/allow-incremental: "true"
  snap.linstor.csi.linbit.com/s3-bucket: $RUSTFSBUCKET
  snap.linstor.csi.linbit.com/s3-endpoint: $RUSTFSENDPOINT
  snap.linstor.csi.linbit.com/s3-signing-region: global
  snap.linstor.csi.linbit.com/s3-use-path-style: "true"
  # Refer here to the secret that holds access and secret key for the S3 endpoint.
  csi.storage.k8s.io/snapshotter-secret-name: linstor-csi-s3-access
  csi.storage.k8s.io/snapshotter-secret-namespace: linbit-sds
EOF
Apply the configuration to your Kubernetes deployment:
kubectl apply -f linstor-volume-snapshot-class-rustfs.yamlVerify that the snapshot class exists in your Kubernetes deployment:
kubectl get volumesnapshotclasses.snapshot.storage.k8s.ioCommand output will be similar to this:
NAME                            DRIVER                   DELETIONPOLICY   AGE
linstor-csi-snapshot-class-s3   linstor.csi.linbit.com   Delete           27s
For more information about working with LINSTOR snapshots in Kubernetes, see the LINSTOR User Guide.
At this point, experienced Kubernetes readers might not need to continue reading. With the setup shown so far, you can use normal Kubernetes workflows to take volume snapshots of an application that has its persistent storage backed by a LINSTOR storage class. Taking a volume snapshot that references the LINSTOR-backed volume snapshot class, linstor-csi-snapshot-class-s3, will create a volume snapshot in your storage cluster and ship it to your RustFS object storage. If you are interested in following along with an example application, keep reading for a demonstration of this workflow.
Setting up an example PostgreSQL application in Kubernetes
After much preparation, it is finally time to set up an example Kubernetes application to back up to your RustFS storage. When the LINBIT team has covered snapshots and backup shipping in other guides and blog articles, often an example NGINX in Kubernetes application was shown. I wanted to do something different and more personally challenging, so I chose a PostgreSQL in Kubernetes use case.
This choice is not entirely on a whim. LINSTOR is most often used to manage DRBD®-replicated storage for high availability and disaster recovery purposes. And historically, DRBD performance excels at replicating data of workloads with frequent small random read and write I/O patterns, such as databases.
To get started on this path, I chose to use the CloudNativePG (CNPG) operator to deploy PostgreSQL in Kubernetes. You can find quick start instructions in CNPG documentation.
To deploy the CNPG operator, enter the following command:
kubectl apply --server-side -f \
  https://raw.githubusercontent.com/cloudnative-pg/cloudnative-pg/release-1.28/releases/cnpg-1.28.0.yaml
❗ IMPORTANT: Replace the version numbers shown in the command with the latest version numbers from the CNPG releases page.
Verify the CNPG operator deployment status:
kubectl rollout status deployment \
  -n cnpg-system cnpg-controller-manager
Output should show that the “cnpg-controller-manager” was successfully rolled out.
Deploying a PostgreSQL database cluster in Kubernetes
After deploying the CNPG operator in your Kubernetes cluster, enter the following command to create an example CNPG database cluster configuration. Experienced database administrators might want to hold their noses here as this basic configuration does not show all the options that you would want to set in a production deployment. For example, in production, you would likely want to specify separate walStorage for the PostgreSQL Write-Ahead Log (WAL) storage and use a different storage class, and possibly backed by a different LINSTOR storage pool that used different physical disks.
First, create a new Kubernetes namespace and set your kubectl command context to it:
kubectl create namespace cnpg-db && \
  kubectl config set-context --current --namespace cnpg-db
Create a configuration file that will define a basic CNPG cluster and initial database, named pagila. You will later populate this database with data from an example database of an imaginary video rental store1.
cat << EOF > cnpg-cluster.yaml
---
apiVersion: postgresql.cnpg.io/v1
kind: Cluster
metadata:
  name: cnpg-example-cluster
spec:
  instances: 3
  backup:
    volumeSnapshot:
      className: linstor-csi-snapshot-class-s3
  storage:
    size: 1Gi
    storageClass: linstor-basic-storage-class
  bootstrap:
    initdb:
      database: pagila
      owner: pagila
EOF
Next, apply the configuration to your Kubernetes cluster:
kubectl apply -f cnpg-cluster.yamlOutput will show that the cluster was created. Wait up to five minutes for the cluster to come up:
kubectl wait pod --for=condition=Ready --timeout=5m \
  -l cnpg.io/cluster=cnpg-example-cluster && \
  echo "CloudNativePG example cluster deployed and ready!"
After the CNPG cluster is deployed and ready, you can list the PVCs in the current namespace:
kubectl get pvcNAME STATUS VOLUME CAPACITY ACCESS MODES STORAGECLASS VOLUMEATTRIBUTESCLASS AGE
cnpg-example-cluster-1 Bound pvc-6afa8ef3-[...] 1Gi RWO linstor-basic-storage-class <unset> 2m45s
cnpg-example-cluster-2 Bound pvc-049f1bc0-[...] 1Gi RWO linstor-basic-storage-class <unset> 62sBy listing LINSTOR resources, you can verify that LINSTOR resources back the new PVCs:
kubectl linstor resource list╭─────────────────────────────────────────────────────────────────────────────────────────────────╮
┊ ResourceName ┊ Node ┊ Layers ┊ Usage ┊ Conns ┊ State ┊ CreatedOn ┊
╞═════════════════════════════════════════════════════════════════════════════════════════════════╡
┊ pvc-049f1bc0-[...] ┊ linstor-testing ┊ DRBD,STORAGE ┊ Unused ┊ Ok ┊ UpToDate ┊ [...] ┊
┊ pvc-049f1bc0-[...] ┊ linstor-testing-m02 ┊ DRBD,STORAGE ┊ InUse ┊ Ok ┊ UpToDate ┊ [...] ┊
┊ pvc-049f1bc0-[...] ┊ linstor-testing-m03 ┊ DRBD,STORAGE ┊ Unused ┊ Ok ┊ UpToDate ┊ [...] ┊
┊ pvc-6afa8ef3-[...] ┊ linstor-testing ┊ DRBD,STORAGE ┊ Unused ┊ Ok ┊ UpToDate ┊ [...] ┊
┊ pvc-6afa8ef3-[...] ┊ linstor-testing-m02 ┊ DRBD,STORAGE ┊ Unused ┊ Ok ┊ UpToDate ┊ [...] ┊
┊ pvc-6afa8ef3-[...] ┊ linstor-testing-m03 ┊ DRBD,STORAGE ┊ InUse ┊ Ok ┊ UpToDate ┊ [...] ┊
[...]
╰─────────────────────────────────────────────────────────────────────────────────────────────────╯More verification within CloudNativePG
List databases, including size information in the example CNPG cluster:
kubectl exec cnpg-example-cluster-1  -c postgres -i -t -- /usr/bin/psql -d pagila \
  --command="SELECT datname AS "Name", pg_catalog.pg_get_userbyid(datdba) \
    AS "Owner", pg_size_pretty(pg_database_size(datname)) AS "Size" \
    FROM pg_database;"
Output will be similar to this:
   name    |  owner   |  size
-----------+----------+---------
 postgres  | postgres | 7830 kB
 pagila    | pagila   | 7830 kB
 template1 | postgres | 7753 kB
 template0 | postgres | 7673 kB
(4 rows)
Setting up service port forwarding to access the example database
List the services in your Kubernetes cluster:
kubectl get svcOutput will be similar to this:
NAME                      TYPE        CLUSTER-IP      EXTERNAL-IP   PORT(S)    AGE
cnpg-example-cluster-r    ClusterIP   10.109.39.193   <none>        5432/TCP   12m
cnpg-example-cluster-ro   ClusterIP   10.101.36.173   <none>        5432/TCP   12m
cnpg-example-cluster-rw   ClusterIP   10.106.46.156   <none>        5432/TCP   12m
kubernetes                ClusterIP   10.96.0.1       <none>        443/TCP    26h
Create port forwarding to the [...]-rw CNPG service so that you can use it as a way to import data into the example database:
kubectl port-forward svc/cnpg-example-cluster-rw 5432:5432 &Next, show the database password for the CNPG example database. You will need this to populate the database by importing an example SQL database.
kubectl get secret cnpg-example-cluster-app -o=jsonpath='{.data.password}' \
  | base64 --decode ; echo
Output will show a decoded password that you can use to access and import data into the example database.
Importing an example database
Enter the following command to import an example database into you CNPG database. I used the Pagila database (pagila-data.sql) from this GitHub repository. Replace the path to the SQL file to another database if you prefer.
psql -h localhost --port 5432 -U pagila -d pagila < postgres-sample-dbs/pagila.sql❗ IMPORTANT: This command requires that you install the PostgreSQL client,
psql, on your host system. You can install this client from the package repositories of most major Linux distributions.
When prompted, enter the password shown from the earlier kubectl get secret command.
Verifying that data was imported into your example database
Again, list the databases in the example CNPG cluster, including size information, this time referencing a read-only (RO) service instance in Kubernetes:
kubectl exec svc/cnpg-example-cluster-ro  -c postgres -i -t -- /usr/bin/psql -d pagila \
  --command="SELECT datname AS "Name", pg_catalog.pg_get_userbyid(datdba) \
    AS "Owner", pg_size_pretty(pg_database_size(datname)) AS "Size" \
    FROM pg_database;"
Verify that the command output shows that pagila database has grown to 16MB:
   name    |    owner    |  size
-----------+-------------+---------
 postgres  | postgres    | 7830 kB
 pagila    | pagila_user | 16 MB
 template1 | postgres    | 7910 kB
 template0 | postgres    | 7673 kB
(4 rows)
Backing up a CNPG database to RustFS storage
There are a few different ways to backup CNPG clusters and databases. CNPG documentation has a good overview of these and considerations around them. Because the main goal of this article is to show LINSTOR snapshot shipping and restoring compatibility with RustFS, instructions and example backup configurations in this guide are simple. You should take them as a proof of concept, rather than as recommendations for your own disaster recovery needs.
Preparing the CNPG database for backing up
Before restoring the example CNPG database from a backup, make a change to a record in the database. This way, you can verify that a backup was restored successfully.
First, show some records related to the Fantasy Troopers film in the database:
kubectl exec svc/cnpg-example-cluster-ro -c postgres -i -t -- /usr/bin/psql \
  --command="SELECT title, description, release_year FROM film WHERE title='FANTASY TROOPERS';" \
  pagila
Output:
      title       |                                           description                                            | release_year
------------------+--------------------------------------------------------------------------------------------------+--------------
 FANTASY TROOPERS | A Touching Saga of a Teacher And a Monkey who must Overcome a Secret Agent in A MySQL Convention |         2006
(1 row)
This is one of my all-time favorite movies and I happen to know that it was released in 2005, not 2006. Before making a change to the database though, I want to make a backup and ship it to my remote object storage (my RustFS instance).
To create a configuration that will create an immediate backup, enter the following command:
cat << EOF > pagila-db-backup.yaml
---
apiVersion: postgresql.cnpg.io/v1
kind: Backup
metadata:
  name: backup-pagila-db
spec:
  method: volumeSnapshot
  cluster:
    name: cnpg-example-cluster
EOF
💡 TIP: There are more backup types and configuration options that you can use when backing up CNPG databases, including scheduling backups. See the CNPG documentation for more details.
Next, apply the configuration to your Kubernetes cluster:
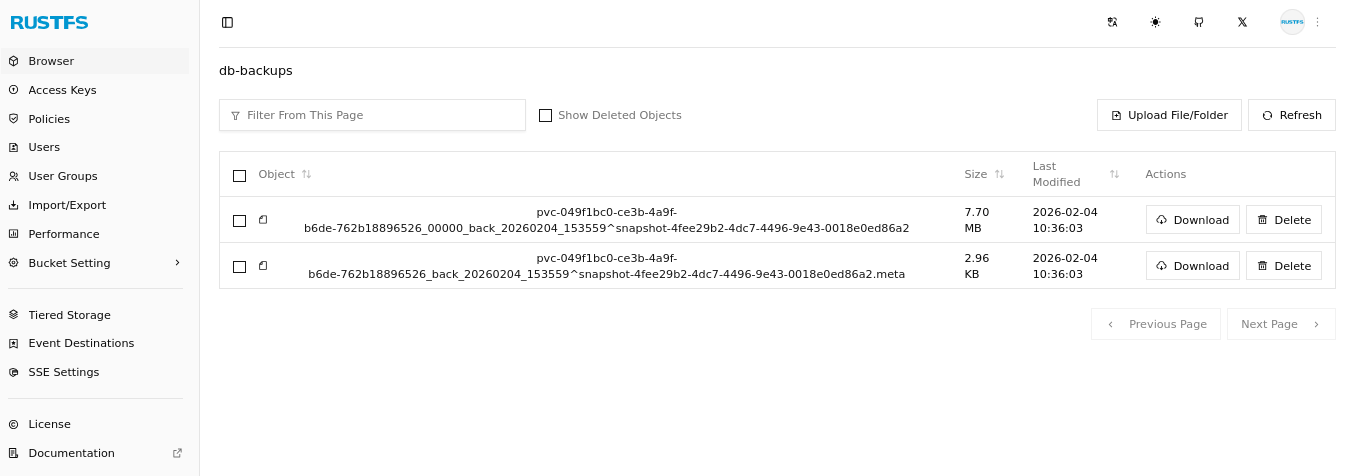
kubectl apply -f pagila-db-backup.yamlAfter creating a backup, you can confirm that LINSTOR shipped the backup to your RustFS storage. Depending on the backup size and the network path to your RustFS instance, this might take some time. RustFS is compatible with the MinIO CLI tool, mc, so you can use that tool to list the contents of the RustFS bucket that you defined in the volume snapshot class earlier.
mc ls rustfs/db-backups --summarizeOutput will be similar to the following and show that a volume snapshot and its metadata object are now in your RustFS object storage bucket:
[2026-02-02 10:11:27 EST] 7.7MiB STANDARD pvc-049f1bc0-[...]^snapshot-4fee29b2-[...]
[2026-02-02 10:11:27 EST] 3.0KiB STANDARD pvc-049f1bc0-[...]^snapshot-4fee29b2-[...].meta

Total Size: 7.7 MiB
Total Objects: 2
If you do not have the MinIO CLI tool installed, you can browse your object storage bucket by using the RustFS GUI in a web browser.
You can also use the LINSTOR client to show your backups.
kubectl linstor backup list myRustFSremoteOutput will be similar to the following:
╭─────────────────────────────────────────────────────────────────────────────────────────╮
┊ Resource           ┊ Snapshot                ┊ Finished at         ┊ Based On ┊ Status  ┊
╞═════════════════════════════════════════════════════════════════════════════════════════╡
┊ pvc-049f1bc0-[...] ┊ snapshot-4fee29b2-[...] ┊ 2026-02-02 19:56:53 ┊          ┊ Success ┊
╰─────────────────────────────────────────────────────────────────────────────────────────╯
After making a backup, change the release year of Fantasy Troopers in the database:
kubectl exec svc/cnpg-example-cluster-rw -c postgres -i -t -- /usr/bin/psql \
  --command="UPDATE film SET release_year = '2005' WHERE title = 'FANTASY TROOPERS';" \
  pagila
Verify that the release year is set to 2005, by entering the following command:
kubectl exec svc/cnpg-example-cluster-ro -c postgres -i -t -- /usr/bin/psql \
  --command="SELECT release_year FROM film WHERE title='FANTASY TROOPERS';" \
  pagila
Restoring a CNPG database from a remote backup
Restoring from remote snapshots is a vitally important step in disaster recovery. Before you can restore data from a snapshot, the snapshot needs to be a defined snapshot in Kubernetes. To define the snapshot in Kubernetes, you need to create two resources, one VolumeSnapshotContent referencing the ID of the snapshot and one VolumeSnapshot, referencing the content.
At the moment, these two resources already exist in your Kubernetes cluster. They were created when you created a backup. You could just restore the example database from these local snapshots. However, suspend some disbelief and imagine that disaster struck your cluster and you do not have these. Perhaps a junior administrator mistakenly did something catastrophic and deleted the volume snapshot (and by implication, its associated volume snapshot contents). An easy way to mimic this scenario is to create a new namespace and set your kubectl command context to it.
kubectl create namespace cnpg-db-restore && \
  kubectl  config set-context --current --namespace cnpg-db-restore
Next, verify that there are no volume snapshots within the new namespace:
kubectl get volumesnapshotsOutput should show that there are no volume snapshot resources found. Whoops! Thankfully you still have the snapshot in your RustFS remote storage.
Create a new volume snapshot and a volume snapshot content configuration referencing the RustFS remote snapshot:
cat << EOF > snapshot-restore-rustfs.yaml
---
apiVersion: snapshot.storage.k8s.io/v1
kind: VolumeSnapshot
metadata:
  name: example-backup-from-rustfs-s3
  namespace: cnpg-db-restore
spec:
  source:
    volumeSnapshotContentName: restored-snap-content-from-s3
  volumeSnapshotClassName: linstor-csi-snapshot-class-s3
---
apiVersion: snapshot.storage.k8s.io/v1
kind: VolumeSnapshotContent
metadata:
  name: restored-snap-content-from-s3
spec:
  deletionPolicy: Retain
  driver: linstor.csi.linbit.com
  source:
    snapshotHandle: snapshot-4fee29b2-[...]
  volumeSnapshotClassName: linstor-csi-snapshot-class-s3
  volumeSnapshotRef:
    apiVersion: snapshot.storage.k8s.io/v1
    kind: VolumeSnapshot
    name: example-backup-from-rustfs-s3
    namespace: cnpg-db-restore
EOF
💡 TIP: If you cannot remember the 46-character long snapshot name (
snapshotHandle) shown from an earlier command, enterkubectl linstor backup list myRustFSremoteto show it again. You can also get the snapshot name from your RustFS GUI, or use anmc lscommand to list the contents of your remote RustFS bucket. ThesnapshotHandleis the part of the RustFS backup name that begins withsnapshot-, before the caret symbol (^) in the remote object name.
Next, apply the configuration:
kubectl apply -f snapshot-restore-rustfs.yamlAfter applying the configuration, list the volume snapshots in the current namespace:
kubectl get volumesnapshotsCommand output should show that the example-backup-from-rustfs-s3 volume snapshot is ready to use.
NAME                            READYTOUSE   SOURCEPVC   SOURCESNAPSHOTCONTENT           RESTORESIZE   SNAPSHOTCLASS                   SNAPSHOTCONTENT                 CREATIONTIME   AGE
example-backup-from-rustfs-s3   true                     restored-snap-content-from-s3   1Gi           linstor-csi-snapshot-class-s3   restored-snap-content-from-s3   24m            8s
Next, define a new CNPG cluster that will populate from the snapshot that you just restored from RustFS storage. This procedure comes from CloudNativePG documentation.
cat << EOF > cnpg-cluster-restored.yaml
---
apiVersion: postgresql.cnpg.io/v1
kind: Cluster
metadata:
  name: cnpg-example-cluster-restored
spec:
  instances: 3
  storage:
    size: 1Gi
    storageClass: linstor-basic-storage-class
  bootstrap:
    recovery:
      volumeSnapshots:
        storage:
          name: example-backup-from-rustfs-s3
          kind: VolumeSnapshot
          apiGroup: snapshot.storage.k8s.io
      database: pagila
      owner: pagila
EOF
Apply the configuration to create a new CNPG cluster:
kubectl apply -f cnpg-cluster-restored.yamlCommand output should show that a new CNPG cluster, cnpg-example-cluster-restored, was created.
Wait up to five minutes for the cnpg-example-cluster-restored CNPG cluster pods to be up and running:
kubectl wait pod --for=condition=Ready --timeout=5m \
  -l cnpg.io/cluster=cnpg-example-cluster-restored && \
  echo "Restored CloudNativePG example cluster deployed and ready!"
Next, list the databases in the restored CNPG cluster, including size information:
kubectl exec svc/cnpg-example-cluster-restored-ro  -c postgres -i -t -- /usr/bin/psql -d pagila \
  --command="SELECT datname AS "Name", pg_catalog.pg_get_userbyid(datdba) \
    AS "Owner", pg_size_pretty(pg_database_size(datname)) AS "Size" \
    FROM pg_database;"
Verify that the command output shows the databases and sizes you expect:
   name    |    owner    |  size
-----------+-------------+---------
 postgres  | postgres    | 7830 kB
 pagila    | pagila_user | 16 MB
 template1 | postgres    | 7910 kB
 template0 | postgres    | 7673 kB
(4 rows)
Finally, verify that the release year of Fantasy Troopers is that of its backup state, 2006:
kubectl exec svc/cnpg-example-cluster-restored-ro -c postgres -i -t -- /usr/bin/psql \
  --command="SELECT release_year FROM film WHERE title='FANTASY TROOPERS';" \
  pagila
Embarrassingly, I just learned that while Fantasy Troopers the movie came out in theaters in 2005, it was released on video for rental in 2006. So, you do not need to update the release year for the movie in the database, because the release year from the backup was correct.
Conclusion
Disaster recovery is a critical part of running production workloads. Data migration is another topic that comes up frequently for businesses, either as site expansion or hardware upgrades happen, or as businesses might need to move workloads and data to different platforms. In both cases, systems and DevOps administrators frequently use object storage.
While DRBD and LINSTOR work with block storage replication and management, LINSTOR can back up and restore storage snapshots to and from S3-compatible object storage, such as RustFS. You can learn more about this topic in the LINSTOR User Guide, in the Kubernetes chapter within the LINSTOR User Guide, and from documentation in the LINSTOR in Kubernetes open source upstream Cloud Native Computing Foundation (CNCF) project, Piraeus Datastore.
If you have questions specific to your business requirements or support for LINBIT software solutions, you can reach out to the LINBIT team.
- The last Blockbuster video rental store, Bend, Oregon, c. 2026
Photo credit: LINBIT Solutions Architect, Matt Kereczman